
Editor tips: inline products, customers, taxes, and reordering rows
Most of what you would otherwise do in Business settings can be done directly from the invoice or estimate editor, without losing the row you were typing into. That covers adding a product, creating a customer, defining a tax rate, and registering a bank account.
Inline product creation
Typing in a line item searches the product catalogue. If nothing matches, the freeform name is accepted as-is.
To turn a freeform line into a reusable product, click the line's name and choose Save as product. The product panel slides in with the name, price and tax rate from the line. Saving links the line to the new product record, so future invoices autocomplete it.
When a line is already linked to a product, the same place shows Edit product. Editing changes the product record, but lines already on existing documents keep their original price and tax (see Historical data in invoices and estimates).
Inline customer creation with business-registry autofill
Start typing a customer name and, if the business's country supports it, Sliptree queries the local business registry in the background. Matches appear under Results from Business Registry below the input.
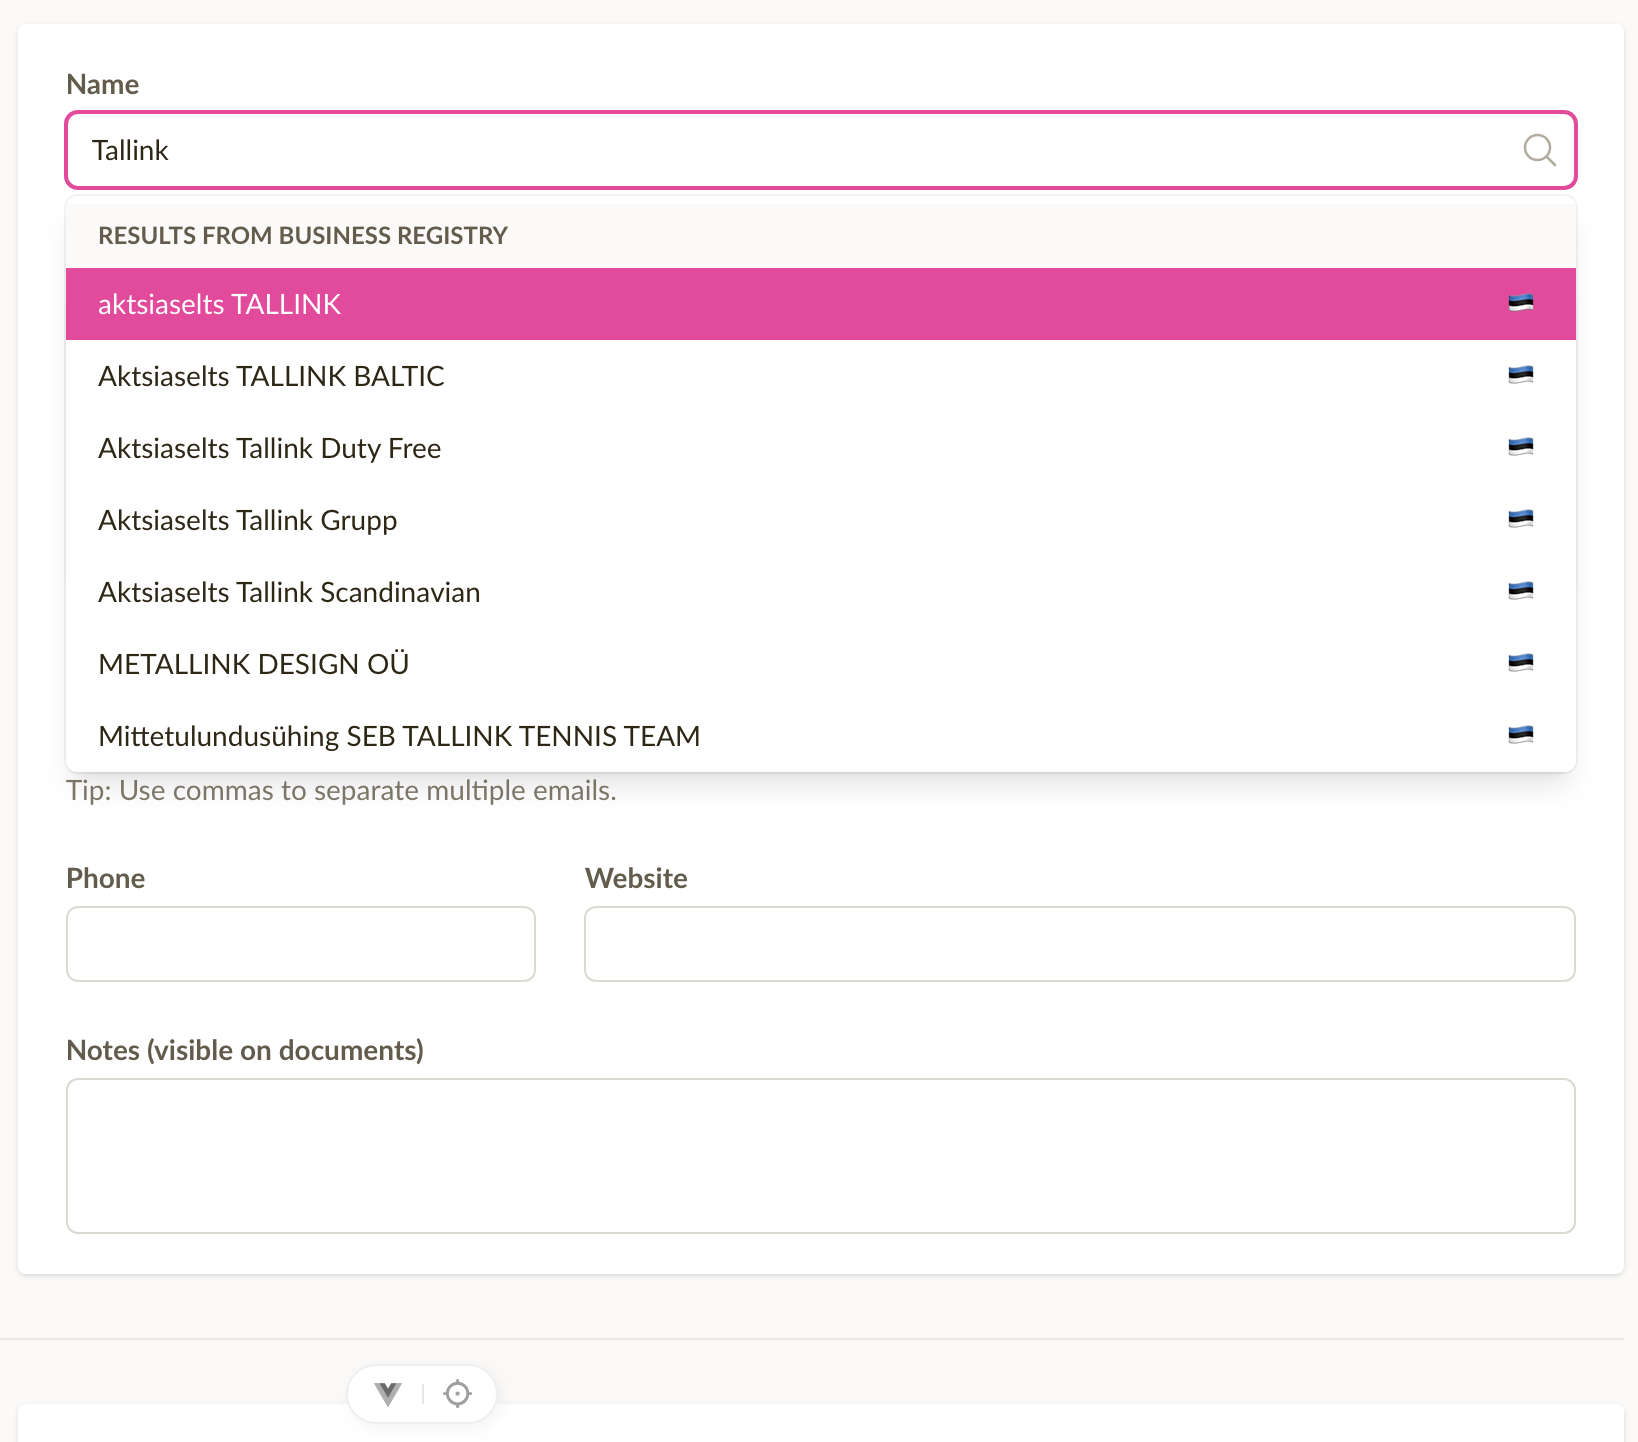
Picking a match fills in the registration number, VAT number, legal address and country. Customers that do not show up — sole proprietors, foreign businesses, private individuals — can be filled in manually. The customer is saved when the document is saved.
Reordering line items
Every line item has a grip handle on its left edge. There are two ways to use it.
Drag the handle up or down to drop the row anywhere in the list:

Or click the handle to open a menu with Move to top, Move up, Move down, and Move to bottom — handy on touch devices or when the list is long:

Next to the grip handle, a + button inserts a new empty row immediately after the current one, so a line does not have to be added at the bottom and dragged into place.

Adding a description or SKU to a line
A line item can carry a description and a SKU, but neither takes up space until it is used. Hover a line and the two are offered underneath it:
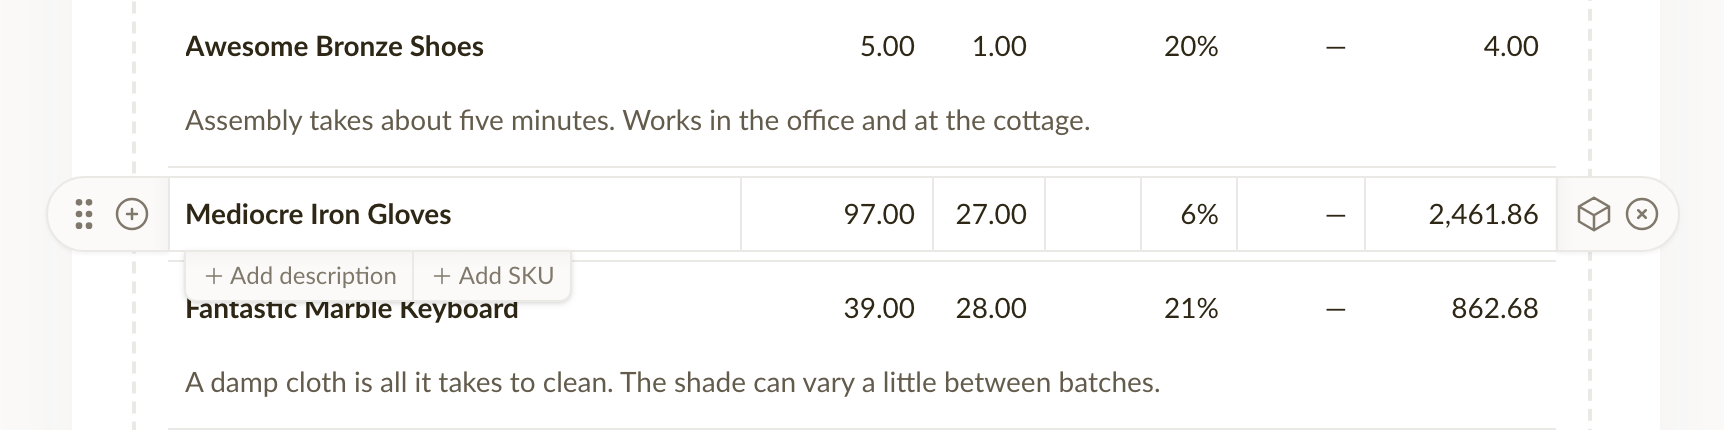
Clicking one opens the field with the cursor already in it. A field you leave empty folds away again when you move to another line. Anything you type stays visible from then on.
Each is offered only while its column is switched on. Turn the description or SKU column off and the button goes with it. You can do that in Invoice settings for one document, or in the business settings for all of them. See Customising invoices and estimates.
On-the-fly tax editing
Clicking the tax rate on any line opens a dropdown of the business's tax rates. From the same dropdown, Add tax rate defines a new rate without leaving the editor, and the new rate is available everywhere immediately. Full rules for editing and deactivating rates are in Managing tax rates.